


In many cases, building your own PC can be cheaper because you avoid pre-built labour costs and can choose parts based on value. However, prices may vary depending on the components you select.

How to Build Your Own PC: A Complete Beginner’s Guide
Building your own computer has become increasingly popular, especially as more people look for machines designed for gaming, programming, content creation, or everyday multitasking. Moreover, if you want to Build your own PC but do not know where to begin, this guide explains each step clearly so that you can approach pc building with confidence. Although the process may seem technical at first, it becomes far easier once you understand the components, tools, and assembly stages involved.
In addition, learning how to build a PC can save you money, improve performance, and help you select parts that genuinely match your needs. Furthermore, many people also choose to build a custom PC so they can control everything from the processor to the cooling system. Therefore, this blog provides a structured overview of the entire process, including planning, part selection, assembly, and testing.
Table of Contents
Why Build Your Own PC?
Although pre-built systems are convenient, they often include unnecessary components or lack the precise specifications you need. Additionally, when you build a PC, you can choose every part, which ensures better performance, easier upgrades, and often a lower overall cost. You also gain essential technical knowledge that helps with future maintenance.
Furthermore, a custom PC allows you to prioritise graphics, processing power, storage, or cooling depending on how you use your device. For example, gamers may need a powerful GPU, while video editors may prefer more RAM and fast NVMe storage. Because of these advantages, many people in the UK now prefer to Build their own PC rather than purchase a standard model.
Step 1: Plan Your Build and Set a Budget
Before starting the pc building process, you must establish a clear budget. The price of a complete system can vary significantly based on whether you intend to use it for work, gaming, or creative tasks. However, consider the long-term value of future upgrades. Once you set your budget, create a list of required components so that you have a clear roadmap from the beginning.
Additionally, planning is essential because it determines how effectively you can match your parts. For instance, choosing a processor automatically influences your choice of motherboard. Furthermore, a well-organised plan prevents compatibility issues and ensures the Build your own PC project goes smoothly.
Step 2: Choose the Essential Components for PC Building
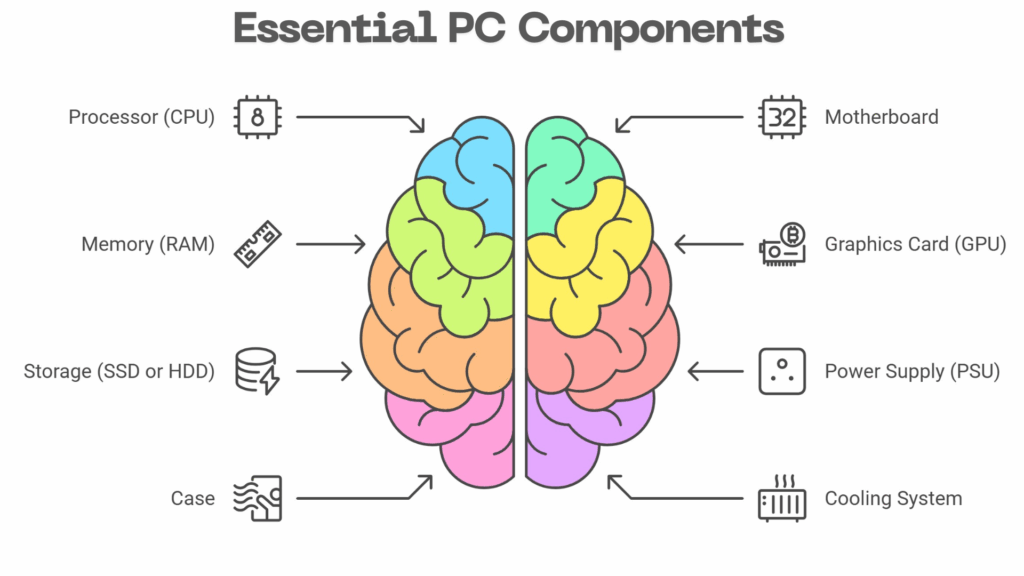
To build a PC, you will need the following parts:
✔ Processor (CPU)
Acts as the brain of your system. Intel and AMD both offer strong options.
Recommended High-Rated CPUs:
- AMD Ryzen 5 7600X – Excellent value, strong multi-core performance, great for gaming and content creation.
- Intel Core i5-13600K – Highly rated for speed and efficiency, ideal for multitasking and productivity work.
✔ Motherboard
Determines what CPU, RAM, and storage you can use. Ensure compatibility before buying.
Recommended High-Rated Motherboards:
- ASUS ROG Strix B650E-Gaming WiFi (For AMD Ryzen builds) – Feature-rich, stable, PCIe 5.0 ready.
- MSI Z690 Tomahawk WiFi DDR5 (For Intel builds) – Excellent VRM design and reliability.
✔ Memory (RAM)
Crucial for multitasking. Most modern custom PC builds include at least 16GB.
Recommended High-Rated RAM Kits:
- G.Skill Ripjaws S5 DDR5 6000MHz (16GB or 32GB) – Fast and stable, ideal for gaming and editing.
- Corsair Vengeance DDR5 5600MHz (16GB or 32GB) – Extremely reliable, widely used in communities.
✔ Graphics Card (GPU)
Important for gaming, editing, and 3D rendering.
Recommended High-Rated GPUs:
- NVIDIA GeForce RTX 4070 – Great performance for 1440p and 4K gaming; highly energy-efficient.
- AMD Radeon RX 7800 XT – Excellent value alternative with strong editing and rendering performance.
✔ Storage (SSD or HDD)
Fast NVMe SSDs significantly improve system responsiveness.
Recommended High-Rated Storage:
- Samsung 990 Pro 1TB NVMe SSD – One of the fastest consumer SSDs available.
- WD Black SN850X 1TB NVMe SSD – Excellent read/write speeds and strong durability.
✔ Power Supply (PSU)
Choose a reliable PSU with enough wattage to support all components.
Recommended High-Rated PSUs:
- Corsair RM750e (750W, 80+ Gold) – Silent, efficient, and ideal for mid-to-high-end builds.
- Seasonic Focus GX-750 (750W, 80+ Gold) – Highly trusted in the PC building community for long-term stability.
✔ Case
This houses all components and affects airflow and cooling.
Recommended High-Rated Cases:
- NZXT H7 Flow – Exceptional airflow, clean layout, easy to build in.
- Corsair 4000D Airflow – Popular for beginners and experts due to excellent ventilation.
✔ Cooling System
Most CPUs include a stock cooler, although performance builds may require aftermarket cooling.
Recommended High-Rated Coolers:
- Dark Rock 4 – Quiet, powerful air-cooling solution.
- Corsair iCUE H100i Elite Capellix (AIO Liquid Cooler) – Great temperatures for high-performance CPUs.
Although many beginners rush to buy parts, take time to compare specifications carefully. Additionally, check compatibility charts to ensure your motherboard supports your CPU, RAM speed, and connection types. Moreover, this step is essential for a successful pc building experience.
Step 3: Prepare Your Workspace (Build Your Own PC workspace)
Once all parts arrive, create a clean and static-free environment. Although you do not need advanced tools, a screwdriver set and good lighting are helpful. Also, keep all manuals nearby because they often include diagrams that simplify installation. Furthermore, preparing your workspace ensures a smoother Build your own PC process and reduces the risk of damaging components.
Step 4: Assemble the Core Components
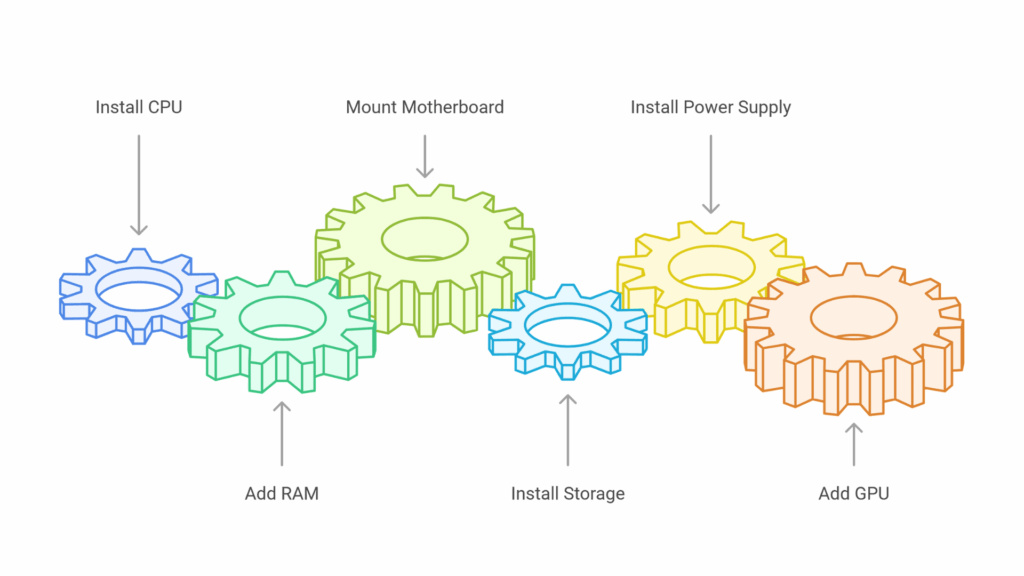
The following steps outline the physical assembly:
1. Install the CPU
Carefully place the CPU into the motherboard socket. Ensure it aligns correctly before closing the latch.
2. Add the RAM
Insert RAM sticks into the appropriate slots until they click into place.
3. Mount the Motherboard
Place the motherboard inside your case and secure it with screws.
4. Install Storage
Slot your SSD or HDD into the designated bay or M.2 slot.
5. Install the Power Supply
Position the PSU in its compartment and route the cables neatly.
6. Add the GPU
Insert the graphics card into the PCIe slot and tighten the securing screws.
Although assembling a custom PC may look complicated, the procedure becomes much easier when followed step by step. In fact, most components are designed to fit securely in only one correct position, which significantly reduces the chance of errors.
Step 5: Connect Cables and Power On
Once everything is in place, begin connecting the cables. This includes the 24-pin motherboard power cable, CPU power cable, SSD connections, fan cables, and GPU cables. Although cable management can feel tedious, neat organisation improves airflow and makes future upgrades easier. Additionally, clear cable routing helps troubleshoot any issues later.
After connecting all components, switch on your PC. If everything is connected correctly, the system will power on and display a BIOS screen. This stage confirms that your Build your own PC project has been assembled successfully.
Step 6: Install the Operating System
After your system boots into the BIOS, set your boot priority to USB and install Windows, Linux, or another operating system. Once installation begins, follow the on-screen steps. Although this stage is straightforward, ensure you download the necessary drivers for your GPU, motherboard, and Wi-Fi adapter. Installing drivers ensures smoother performance and stable functionality.
Step 7: Test and Optimise Your Custom PC
Once your system is running, begin testing the hardware. You can check temperatures, run benchmark tests, and install any essential applications. Although some users overlook optimisation, it plays an important role in ensuring long-term performance. Additionally, monitor your system regularly so that you can manage updates or upgrades whenever needed.
By this stage, your pc building process is complete. Additionally, you should now have a fully functioning machine tailored to your needs. Because you selected every component yourself, you can expect better long-term flexibility and easier future upgrades.
Want to Learn PC Building Properly? Join Our Full Course
Although this guide introduces the main steps, building a reliable system requires deeper understanding. Therefore, we created the “Build Your Own PC” course covering:
- Plan your full PC build
- Choose compatible components
- Assemble all parts step by step
- Manage cables neatly
- Optimise cooling and airflow
- Configure BIOS settings
- Troubleshoot common issues
- Future-proof your custom PC
- Learn through real build demonstrations
If you want step-by-step video lessons, demonstrations, and expert guidance, this course is the ideal next step. You will learn how to Build your own PC confidently, safely, and with professional accuracy.

Frequently Asked Questions Of Build your own PC
Building a PC involves selecting compatible components—such as the CPU, motherboard, RAM, storage, GPU, and PSU—and assembling them into a functioning computer. Furthermore, it allows you to control performance, quality, and upgrade options.
To build a PC, you choose compatible parts, prepare your workspace, install core components like the CPU, RAM, storage, and GPU, and then connect cables before installing the operating system. Following a step-by-step guide makes the process straightforward.
Building a gaming PC requires choosing a strong GPU, a powerful CPU, fast RAM, and cooling that can handle extended gameplay. Moreover, after selecting the parts, assemble them carefully and configure settings for optimal gaming performance.
Yes, it is often cheaper to build your own PC, especially if you shop for deals and pick components based on performance per pound. Additioanlly, you also get better long-term upgrade flexibility.
Yes, building your own PC in 2025 is still worth it because hardware pricing has stabilised, customisation options are greater, and you can tailor the system to gaming, editing, or professional needs. Furthermore, it also ensures easier future upgrades.
1TB is better for gaming because modern titles require large amounts of storage, and updates can consume significant space. Although 512GB works for smaller libraries, 1TB offers much more long-term flexibility.
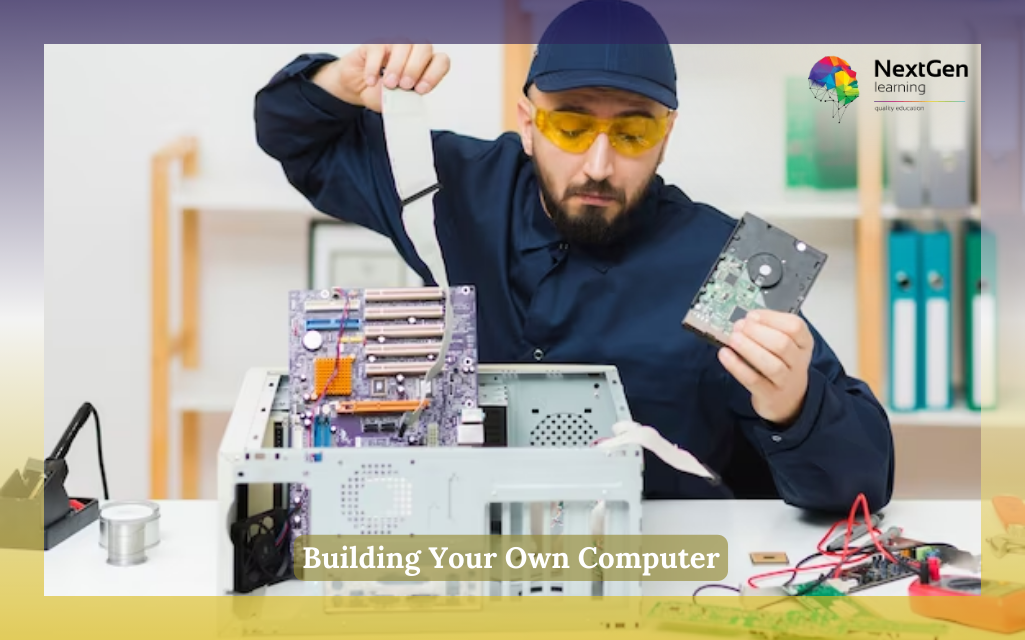
Building Your Own Computer
Certificate:
yes (Free)
Accreditation:
CPD Certificate
Access:
Lifetime

0 responses on "How to Build Your Own PC: A Complete Beginner’s Guide"