




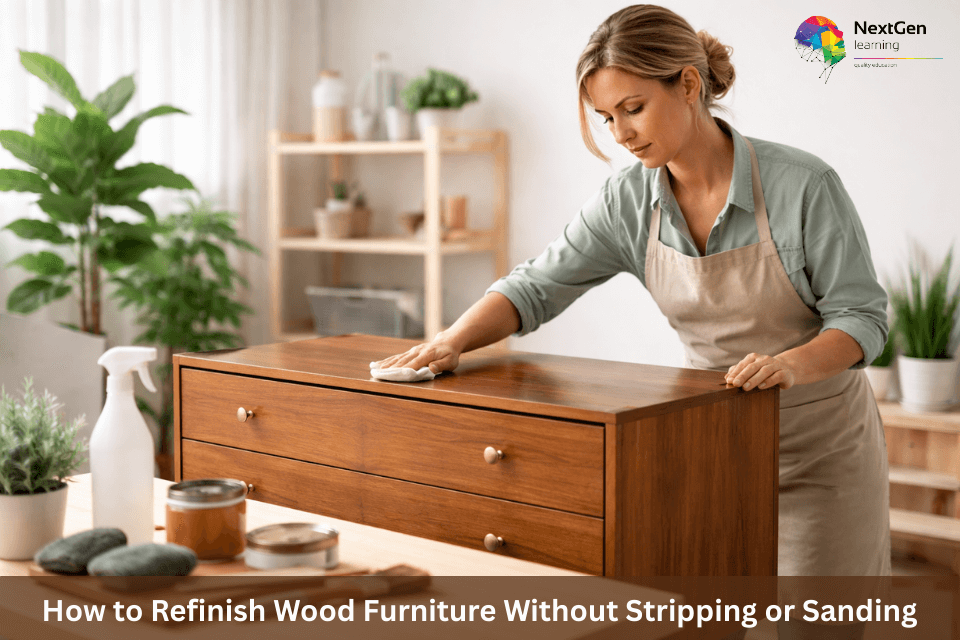
How to Refinish Wood Furniture Without Stripping or Sanding
Old wood furniture often looks tired. However, that doesn’t mean you need to strip or sand it completely. In fact, refinishing wood furniture without stripping or sanding has become one of the most popular DIY methods for homeowners who want fast, affordable results.
Many people assume sanding is mandatory. However, modern products like liquid deglossers and gel stains allow you to refresh finished wood surfaces with far less effort. As a result, you save time, reduce dust, and avoid harsh chemical strippers.
Importantly, this method works best when the furniture is structurally sound but visually worn. If the finish looks dull, scratched, or outdated, you can often restore it without removing the original layer entirely. Therefore, instead of spending days sanding, you can complete a furniture makeover in a single weekend.
In this complete guide, you’ll learn:
- When refinishing without sanding actually works
- The exact tools and materials you need
- A professional step-by-step workflow
- Common mistakes beginners make
- Cost and time expectations
- Safety considerations
By the end, you’ll know exactly how to refinish wood furniture without stripping or sanding — and whether this approach is right for your project.
Table of Contents
Can You Really Refinish Wood Furniture Without Sanding?
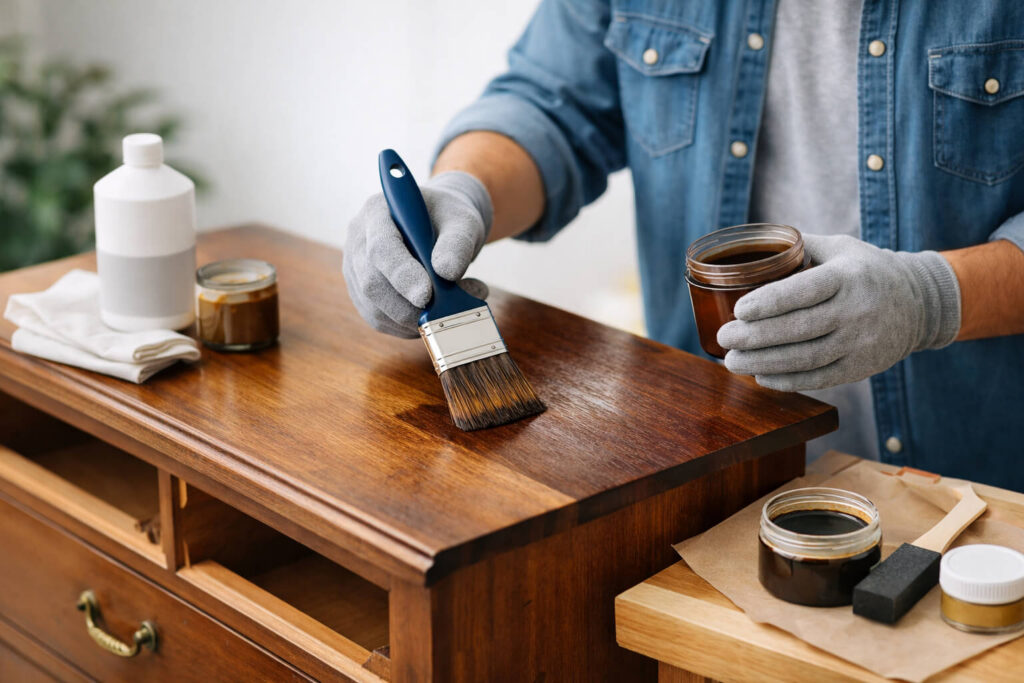
Yes, you can refinish wood furniture without sanding — but only under the right conditions. However, this method is not magic. It works because modern refinishing products are designed to bond to existing finishes rather than raw wood.
Traditionally, sanding removes the old finish so new stain can penetrate the surface. However, products like liquid deglossers and gel stains work differently. Instead of stripping the surface completely, they prepare it so the new layer adheres properly. As a result, you avoid heavy dust, long prep time, and physical strain.
That said, this technique works best when:
- The existing finish is intact, not peeling
- The wood is not deeply scratched or gouged
- There is no structural damage
- The surface is not heavily waxed or greasy
If the furniture has severe water damage, thick polyurethane buildup, or deep dents, sanding may still be necessary. Therefore, proper assessment is critical before starting.
How Does It Work?
Instead of removing the finish, you:
- Clean thoroughly
- Degloss the shiny topcoat
- Apply a bonding stain or paint
- Seal the surface
Because gel stain sits on top of the wood rather than soaking deeply into it, it creates a new colour layer without requiring bare wood. Similarly, chalk paint adheres well to finished surfaces with minimal prep.
However, skipping sanding does not mean skipping preparation. Surface cleaning and deglossing are essential. Without them, the new finish may peel or streak.
When You Should NOT Skip Sanding
Although refinishing without sanding is convenient, it is not always appropriate. You should avoid this shortcut if:
- The furniture has peeling varnish
- The surface feels uneven or bubbled
- There are deep scratches exposing raw wood
- The piece has multiple thick paint layers
- You want to dramatically lighten the wood colour
In these cases, sanding ensures durability and long-term results.
The Key Advantage
The biggest benefit of refinishing wood furniture without stripping or sanding is efficiency. You reduce labour significantly. Moreover, you minimise airborne dust and chemical exposure. Therefore, for many homeowners, this method strikes the perfect balance between effort and results.
However, success depends on understanding when the method works — and when it doesn’t.
When This Method Works — And When It Doesn’t
Refinishing wood furniture without stripping or sanding can deliver impressive results. However, it only works when the surface condition supports it. Therefore, before you begin, you must evaluate your furniture carefully.
This method is ideal for cosmetic upgrades. In other words, it works best when the structure is solid but the appearance looks outdated, faded, or slightly scratched.
When It Works Best
You can confidently skip sanding when:
- The existing finish is smooth and firmly attached
- The surface has light scratches but no deep gouges
- The colour looks dull or orange-toned and needs updating
- The furniture is made from solid wood or high-quality veneer
- The piece is structurally stable
Because gel stain and bonding paints adhere to prepared finishes, you can refresh colour without removing the original coating. As a result, you save hours of prep work.
This approach is especially effective for:
- Dressers
- Side tables
- Cabinets
- Dining chairs
- Coffee tables
Moreover, it works well on medium-to-dark colour transitions. For example, you can easily shift from honey oak to espresso or walnut tones.
When It Does NOT Work
Although this method is convenient, it fails under certain conditions. Therefore, do not skip sanding if:
- The finish is peeling or flaking
- The wood has deep water rings
- There are cracks, rot, or structural damage
- The surface has thick polyurethane buildup
- You want to go from very dark to very light wood
In these cases, applying new product over unstable layers will only trap the problem underneath. Consequently, the finish may chip, bubble, or wear unevenly.
Additionally, laminate surfaces require special primers. While you can refinish laminate without sanding in some cases, you must use proper bonding products.
Solid Wood vs Veneer — Important Distinction
Understanding your material is critical.
- Solid wood tolerates refinishing methods more easily
- Thin veneer requires extra caution
- Laminate needs bonding primer
Because veneer layers are thin, aggressive sanding can ruin them. Therefore, a no-sanding method may actually be safer for veneer — as long as the surface is intact.
Quick Self-Assessment Checklist
Before you begin, ask yourself:
- Is the finish smooth and stable?
- Are imperfections shallow?
- Am I darkening rather than lightening the wood?
- Is the structure strong?
If you answered yes to most of these, refinishing without sanding is likely suitable.
However, if you notice structural or finish instability, sanding or partial stripping may be the better long-term solution.
Tools & Materials You’ll Need
Before you begin refinishing wood furniture without stripping or sanding, preparation is essential. Although this method reduces labour, it still requires the right materials. Therefore, gathering everything in advance will prevent mistakes and uneven results.
Importantly, using proper products ensures adhesion and durability. If you skip key materials, the finish may peel or streak. As a result, careful preparation protects your effort.
Essential Cleaning Supplies
Surface preparation determines success. Even the best gel stain will fail on a dirty surface.
You’ll need:
- Mild dish soap or wood cleaner
- Warm water
- Microfiber cloths
- Degreaser (for kitchen furniture)
- Fine synthetic scouring pad
Because dirt and oils block adhesion, cleaning must be thorough. However, avoid soaking the wood. Instead, wipe gently and allow it to dry completely.
Surface Preparation Products (No Sanding Alternative)
Instead of sandpaper, you’ll use a bonding prep solution.
Key item:
- Liquid deglosser (liquid sandpaper)
A deglosser dulls the shiny topcoat. Consequently, it creates microscopic texture that allows new finishes to bond properly.
You may also need:
- Lint-free cloth
- Disposable gloves
- Protective eyewear
Although sanding creates dust, deglossers contain chemicals. Therefore, always work in a ventilated space.
Colour & Finish Options
Your finish choice determines the final look. However, not all products behave the same.
Option 1: Gel Stain
Best for:
- Darkening wood
- Preserving grain visibility
- Achieving a rich finish
Advantages:
- Thick consistency
- Minimal dripping
- Sits on top of finished wood
- Easy application with cloth
Option 2: Chalk Paint
Best for:
- Matte or vintage finishes
- Full colour coverage
- Light-to-dark transformations
Advantages:
- Excellent adhesion
- Minimal prep required
- Easy layering
Option 3: Bonding Primer + Latex Paint
Best for:
- Modern painted finishes
- Laminate surfaces
- Dramatic colour changes
Because primer improves grip, it reduces peeling risk.
Sealing & Protection
After applying stain or paint, sealing is mandatory. Without a topcoat, the finish will wear quickly.
Choose one:
- Water-based polyurethane (durable, clear)
- Oil-based polyurethane (warm tone)
- Furniture wax (soft sheen, lighter use areas)
- Polycrylic (fast-drying option)
Because high-touch surfaces experience friction, choose polyurethane for durability.
Application Tools
To achieve smooth results, use:
- Foam brushes
- High-quality paintbrush
- Stain applicator pad
- Lint-free cloth
- Small detail brush (for corners)
Avoid cheap brushes. They shed bristles and ruin finishes.
Estimated Budget
Refinishing without sanding is cost-effective. On average:
- Deglosser: £8–£15
- Gel stain: £12–£25
- Chalk paint: £15–£30
- Polyurethane: £10–£25
Total estimated cost: £40–£80 per project
However, costs vary by brand and furniture size.
Having the right tools simplifies the process significantly. Moreover, preparation reduces the risk of peeling, blotching, or uneven coverage.
Next, we’ll move into the complete professional workflow.
Step-by-Step Process to Refinish Wood Furniture Without Sanding

Now that you understand when this method works and what tools you need, it’s time to follow a structured process. Although skipping sanding saves effort, the steps must be precise. Therefore, do not rush through preparation.
This workflow mirrors professional refinishing practices — just without the heavy sanding stage.
Step 1: Deep Clean the Surface
First and foremost, remove all dirt, wax, and grease. Even invisible residue can prevent adhesion.
- Mix mild soap with warm water
- Wipe down every surface thoroughly
- Pay special attention to edges and handles
- Remove hardware if possible
- Let the furniture dry completely
If the piece was in a kitchen, use a degreaser. Because oils block stain absorption, this step is critical.
Importantly, do not skip drying time. Moisture trapped under stain can cause cloudiness later.
Step 2: Apply Liquid Deglosser (Liquid Sandpaper)
Instead of sanding, you will chemically dull the surface.
- Wear gloves
- Soak a lint-free cloth with deglosser
- Wipe evenly across the surface
- Allow it to sit per product instructions
- Do not rinse
Because deglosser softens the glossy topcoat slightly, it improves bonding. However, you must apply evenly to avoid patchy adhesion.
Work in sections if the furniture is large. Moreover, ensure proper ventilation.
Step 3: Apply Gel Stain or Paint
Once the surface is prepped, apply your chosen finish.
If Using Gel Stain:
- Apply a thin coat with a cloth or brush
- Wipe in the direction of the grain
- Allow it to sit for several minutes
- Wipe off excess evenly
Because gel stain sits on the surface, thicker coats can cause streaking. Therefore, build colour gradually with multiple light coats.
Allow 8–24 hours drying time between coats, depending on brand.
If Using Chalk Paint:
- Use a high-quality brush
- Apply thin, even coats
- Let dry fully before the second coat
- Lightly buff between coats if needed
Chalk paint covers well. However, thin coats reduce brush marks.
Step 4: Allow Proper Drying Time
This step is often ignored. However, rushing drying leads to fingerprints, streaks, and weak bonding.
- Gel stain: 8–24 hours between coats
- Paint: 2–6 hours depending on formula
- Before sealing: ensure full cure
Temperature and humidity affect drying. Therefore, work in a stable indoor environment.
Step 5: Seal the Finish
Sealing protects your work. Without a protective topcoat, daily use will damage the surface.
- Apply polyurethane with a foam brush
- Use long, even strokes
- Avoid over-brushing
- Let dry fully
- Apply a second coat if needed
For light-use furniture, wax may be enough. However, for dining tables or desks, polyurethane is strongly recommended.
Step 6: Reattach Hardware or Upgrade It
Once fully cured:
- Reinstall original hardware
- Or upgrade knobs and handles
New hardware can dramatically modernise the piece. As a result, the transformation feels complete.
Timeline Expectation
A typical project follows this schedule:
- Day 1: Clean + Degloss
- Day 1–2: Apply stain/paint
- Day 2–3: Seal + cure
Most projects finish within 2–3 days, depending on drying conditions.
By following this structured process, you reduce risk and increase durability. Although sanding is skipped, preparation and patience remain essential.
Gel Stain vs Chalk Paint vs Polyurethane — Which Is Better?
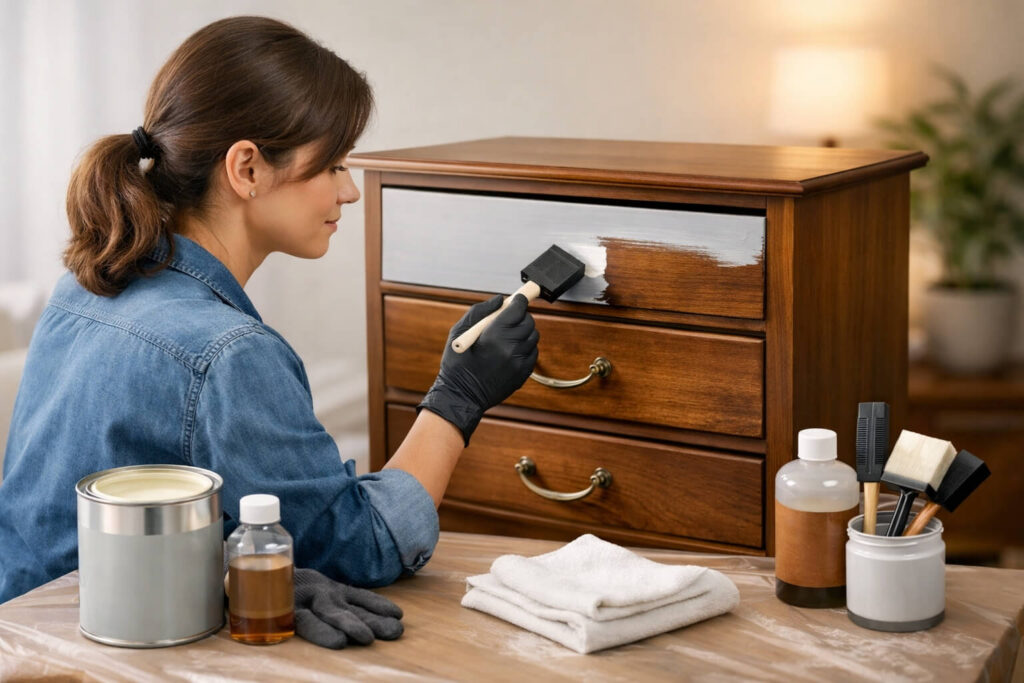
Choosing the right finish determines the final look, durability, and maintenance level. Although all three options work without sanding, they serve different purposes. Therefore, selecting the wrong one can limit your results.
Let’s break them down clearly.
1️⃣ Gel Stain — Best for Natural Wood Look
Gel stain is ideal if you want to preserve visible wood grain. Unlike traditional stain, it sits on top of the existing finish rather than penetrating deeply. As a result, it works well on sealed wood surfaces.
Best for:
- Darkening wood tones
- Updating orange or yellow oak
- Maintaining a classic wood appearance
Advantages:
- Thick consistency reduces drips
- Easy application with cloth
- Good control over colour depth
- Works well without sanding
Limitations:
- Difficult to lighten wood
- Requires careful wiping to avoid streaks
- Longer drying time
If your goal is a rich walnut, espresso, or darker finish, gel stain is usually the best option.
2️⃣ Chalk Paint — Best for Matte or Modern Finishes
Chalk paint provides full colour coverage. Therefore, it’s ideal if you want to completely change the furniture’s look rather than enhance the grain.
Best for:
- Vintage or farmhouse style
- Bold colour transformations
- Covering mismatched wood tones
Advantages:
- Excellent adhesion
- Minimal surface prep
- Fast drying
- Easy layering
Limitations:
- Requires sealing
- Less durable without topcoat
- Brush strokes may show if applied thickly
If you want white, grey, navy, or pastel finishes, chalk paint delivers faster results.
3️⃣ Polyurethane — Best for Protection
Polyurethane is not a colour product. Instead, it is a protective topcoat. However, it plays a critical role in durability.
Best for:
- High-traffic furniture
- Dining tables
- Desks
- Kitchen cabinets
Advantages:
- Strong protection
- Water resistance
- Scratch resistance
- Long-lasting finish
Limitations:
- Requires careful application
- May slightly alter colour tone
- Needs full curing time
Importantly, even if you use gel stain or chalk paint, sealing with polyurethane significantly extends lifespan.
Quick Comparison Table (Simplified)
Feature | Gel Stain | Chalk Paint | Polyurethane |
Changes Colour | Yes (darkens) | Yes (full coverage) | No |
Shows Wood Grain | Yes | No | Yes (clear) |
Needs Topcoat | Yes | Yes | Already protective |
Best For | Natural finish | Decorative style | Protection |
So, Which One Should You Choose?
- Choose gel stain if you want a realistic wood transformation.
- Choose chalk paint if you want a bold style change.
- Use polyurethane to protect either option.
In many cases, the best approach combines them. For example, apply gel stain for colour, then seal with polyurethane for durability.
Ultimately, your choice depends on aesthetic preference, usage level, and maintenance expectations.
Common Mistakes to Avoid When Refinishing Without Sanding
Refinishing wood furniture without stripping or sanding can deliver beautiful results. However, small mistakes can quickly ruin the finish. Therefore, understanding common errors will save you time, money, and frustration.
Although this method is simpler than traditional refinishing, it still requires attention to detail.
1️⃣ Skipping Proper Cleaning
Many beginners rush straight to staining. However, dirt, wax, and grease prevent adhesion.
Avoid this by:
- Cleaning thoroughly with soap or degreaser
- Drying completely before applying any product
- Paying attention to corners and edges
If the surface is not clean, the finish may peel within weeks.
2️⃣ Applying Thick Coats
Thick coats seem faster. However, they create streaks, bubbles, and uneven colour.
Instead:
- Apply thin, even layers
- Build colour gradually
- Allow full drying between coats
Because gel stain sits on top of the finish, heavy application leads to blotchy results.
3️⃣ Ignoring Drying Time
Rushing the process is one of the biggest mistakes. Even if the surface feels dry, it may not be fully cured.
Common errors include:
- Sealing too early
- Reattaching hardware too soon
- Placing objects on uncured surfaces
As a result, fingerprints, dents, and smudges may appear.
Always follow manufacturer drying guidelines.
4️⃣ Skipping the Deglosser Step
Some people believe cleaning alone is enough. However, glossy finishes resist new coatings.
Deglosser:
- Dulls shine
- Improves adhesion
- Reduces peeling risk
If you skip this step, the new finish may scratch off easily.
5️⃣ Choosing the Wrong Product for the Surface
Not all furniture materials behave the same.
Common product mismatches:
- Using regular stain on sealed wood
- Applying paint without bonding primer on laminate
- Using wax only on high-traffic tables
Because each surface reacts differently, match the product to the material.
6️⃣ Forgetting to Seal the Finish
Unsealed stain or paint wears quickly. Therefore, sealing is not optional.
Always:
- Apply polyurethane for durability
- Use wax for light-use decorative pieces
- Add multiple coats for tables and desks
Skipping this step reduces lifespan dramatically.
7️⃣ Not Testing First
Even experienced DIYers test first. Colour can look different on sealed wood than expected.
Before committing:
- Test on the back or underside
- Check colour in natural light
- Confirm adhesion after drying
Testing prevents costly rework.
Why Avoiding Mistakes Matters
Although refinishing without sanding saves effort, the margin for error is smaller. Because you are working over an existing finish, proper bonding is essential.
By avoiding these common mistakes, you significantly improve durability and professional appearance.
Cost Breakdown & Time Estimate
One of the biggest advantages of refinishing wood furniture without stripping or sanding is cost efficiency. However, understanding the real budget helps you plan properly. Therefore, let’s break it down clearly.
Although prices vary by brand and furniture size, most DIY projects remain affordable.
💰 Estimated Material Costs
Below is a realistic average cost range (UK-based estimates):
- Liquid deglosser: £8–£15
- Gel stain: £12–£25
- Chalk paint: £15–£30
- Polyurethane or polycrylic: £10–£25
- Brushes, cloths, gloves: £10–£20
Typical total per project: £40–£90
However, if you already own brushes or applicators, costs may drop closer to £30–£50.
🆚 Cost Comparison: No Sanding vs Traditional Refinishing
Method | Estimated Cost | Effort Level | Equipment Needed |
No Sanding Method | £40–£90 | Moderate | Basic supplies |
Full Sanding & Stripping | £80–£200 | High | Sander, stripper, PPE |
Professional Refinishing | £150–£600+ | None (outsourced) | N/A |
Because traditional refinishing often requires power tools and chemical strippers, costs increase quickly. As a result, skipping sanding reduces both financial and physical investment.
⏳ Time Estimate
Although drying time varies, most projects follow this timeline:
Day 01
- Clean surface
- Apply deglosser
- Apply first coat
Day 02
- Apply second coat
- Allow drying
Day 03
- Seal with polyurethane
- Begin curing
Light-use furniture may be ready within 48 hours. However, full curing can take 5–7 days depending on humidity and temperature.
Factors That Affect Time
Several elements influence how long the project takes:
- Furniture size
- Number of coats
- Indoor temperature
- Humidity levels
- Product drying speed
Because rushing leads to flaws, patience improves durability.
Is It Worth It?
In most cases, yes. You save hundreds compared to professional refinishing. Moreover, you extend the life of solid wood furniture without major labour.
However, if the furniture is structurally damaged, refinishing alone may not justify the effort.
Safety Tips You Shouldn’t Ignore
Refinishing wood furniture without stripping or sanding is safer than heavy chemical stripping. However, that does not mean it is risk-free. Therefore, taking basic precautions protects both your health and your results.
Although the products seem mild, many contain solvents and bonding agents. Consequently, proper handling is essential.
1️⃣ Work in a Well-Ventilated Area
Even low-odour products release fumes.
To stay safe:
- Open windows and doors
- Use a fan to circulate air
- Avoid small enclosed rooms
- Take breaks if fumes feel strong
Because inhaling vapours for long periods can cause headaches or dizziness, airflow matters.
2️⃣ Wear Basic Protective Gear
You don’t need full industrial equipment. However, simple protection makes a difference.
Always use:
- Nitrile or latex gloves
- Protective eyewear
- Long sleeves
- A basic mask if ventilation is limited
Deglossers and polyurethane can irritate skin. Therefore, avoid direct contact.
3️⃣ Store Products Safely
Improper storage increases fire risk.
Follow these guidelines:
- Keep lids tightly sealed
- Store away from heat sources
- Avoid direct sunlight
- Keep out of reach of children
Because many finishes are flammable, store them responsibly.
4️⃣ Dispose of Rags Properly
This step is often overlooked. However, oil-based stain rags can self-ignite if left crumpled.
After use:
- Lay rags flat to dry completely
- Store in a metal container
- Dispose according to local waste rules
Never pile damp stain cloths in a corner.
5️⃣ Protect Surrounding Areas
Even careful application can drip.
To avoid damage:
- Use drop cloths
- Tape off nearby walls
- Remove hardware before starting
Preparation prevents accidental staining of floors or carpets.
6️⃣ Respect Cure Time
Safety also includes durability. If you use furniture before it fully cures, surfaces may dent or stick.
Therefore:
- Wait at least 24–48 hours before light use
- Allow 5–7 days before heavy use
- Avoid placing heavy items immediately
Because curing strengthens the finish, patience improves longevity.
Why Safety Matters
Although skipping sanding reduces dust exposure, chemical products still require responsible handling. By following these simple precautions, you reduce risk while maintaining professional results.
Safety enhances both trust and quality.
Frequently Asked Questions (Optimised for Featured Snippets)
Yes. If the existing finish is intact, you can clean the surface, apply a liquid deglosser, and use gel stain or bonding paint. However, this method won’t work on peeling, deeply scratched, or structurally damaged furniture.
Yes, but only with gel stain. Traditional stain won’t bond to sealed wood. Clean and degloss the surface first to ensure proper adhesion and even colour.
Most projects take 2–3 days, including drying time. However, full curing can take up to 7 days. Avoid heavy use until the finish is fully hardened.
Yes, if done correctly. Clean thoroughly, use deglosser, apply thin coats, and seal with polyurethane. Without a topcoat, the finish will wear faster.
Yes. In fact, it’s often safer. Veneer is thin, so sanding can damage it. A no-sanding method works well if the veneer is intact and not peeling.
Final Thoughts
Refinishing wood furniture without stripping or sanding offers a practical, budget-friendly alternative to traditional restoration. However, success depends on understanding when the method works, preparing the surface correctly, and applying finishes with patience.
When done properly, this approach can transform tired furniture in just a weekend. Moreover, it reduces dust, labour, and chemical exposure compared to full stripping.
If your furniture is structurally sound but visually worn, this method provides an efficient way to refresh and protect it for years to come.

Furniture Restoration and Styling

0 responses on "How to Refinish Wood Furniture Without Stripping or Sanding"